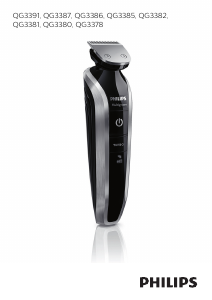
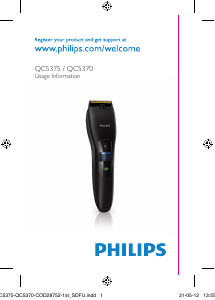
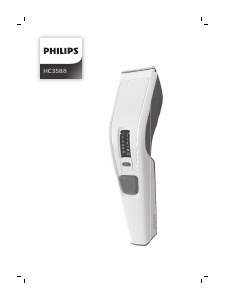
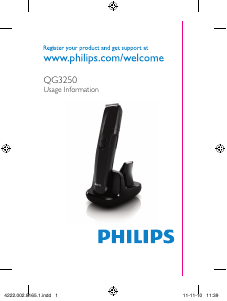
사용 설명서 필립스 QG3150 이발기
필립스 QG3150 이발기 에 대한 매뉴얼이 필요하십니까? 아래에서 한국어로 된 PDF 매뉴얼을 무료로 보고 다운로드할 수 있습니다. 이 제품은 현재 2 개의 자주 묻는 질문(FAQ), 0 개의 댓글 및 0 개의 투표를 보유하고 있습니다. 원하시는 매뉴얼이 아닐 경우 당사로 연락주시기 바랍니다.
제품 결함에 대한 해결책이 사용 설명서에 없나요? Repair Café 가셔서 무료 수리 서비스를 받을 수 있습니다.
사용 설명서
Loading…

Beard trimming without beard trimming
comb
Use the beard trimmer without the beard trimming comb
to contour your beard and to remove single hairs.
Cutting without comb results in a very short stubble
beard (0.6mm).
1 Press the setting selector upwards and pull the
beard trimming comb off the handle (Fig. 18).
2 Make careful and controlled movements with
the beard trimmer. Touch the hair lightly with the
cutting element.
Beard trimming with precision trimmer
Use the precision trimmer to shape your moustache and
sideburns, to dene contours and to remove single hairs.
1 Hold the appliance upright and trim the desired
areas (Fig. 19).
Grooming facial hair (nose hair and ear hair)
Trimming nose hair
1 Put the nose/ear hair trimmer on the handle (see
section ‘Attaching/detaching attachments’ in chapter
‘Preparing for use’).
2 Make sure your nostrils are clean.
3 Switch on the appliance and insert the tip of the
trimmer into one of your nostrils. (Fig. 20)
Do not insert the tip more than 0.5cm into your nostril.
4 Slowly move the tip in and out while turning it
round at the same time to remove unwanted hair.
To reduce the tickling effect, make sure that you press the
side of the tip rmly against the skin.
Trimming ear hair
1 Put the nose/ear hair trimmer on the handle (see
section ‘Attaching/detaching attachments’ in chapter
‘Preparing for use’).
2 Clean the outer ear channel. Make sure it is free
from wax.
3 Switch on the appliance and move the tip softly
round the ear to remove hairs that stick out
beyond the rim of the ear. (Fig. 21)
4 Carefully insert the tip into the outer ear
channel. (Fig. 22)
Do not insert the tip more than 0.5cm into the ear
channel as this could damage the eardrum.
Shaving
Shaving with the micro shaver
Use the micro shaver to create smooth, well-dened
contours.
Before you use the micro shaver, always check it for
damage or wear. If the foil or cutter is damaged or
worn, do not use the micro shaver, as injury may occur.
If the foil is damaged, replace the top part of the micro
shaver and if the cutter is damaged, replace the whole
attachment before you use the micro shaver again.
1 Pre-trim the contours you want to shave with the
cutting element without comb or the precision
trimmer.
2 Put the micro shaver on the handle (see
section ‘Attaching/detaching attachments’ in chapter
‘Preparing for use’).
3 Gently press the micro shaver onto the skin
and shave along contoured edges to remove any
stubble.
Do not press too hard.
Cleaning
Do not use water or a moist cloth to clean the handle.
Never use compressed air, scouring pads, abrasive
cleaning agents or aggressive liquids such as petrol or
acetone to clean the appliance.
Note: The appliance does not need any lubrication.
Clean the appliance every time you have used it.
1 Make sure the appliance is switched off and
disconnected from the socket.
2 Remove any comb and/or attachment from the
appliance.
3 If you have used the micro shaver, separate its top
part from its body (Fig. 23).
The shaving foil is very delicate. Handle it carefully.
Replace the top part of the micro shaver if the shaving
foil is damaged.
Do not clean the shaving foil with the brush, as this may
cause damage.
4 Blow and/or shake out any hair that has
accumulated in the attachments and/or combs.
5 Clean the attachments and the combs with
lukewarm water or with the cleaning brush.
6 Clean the adapter with the cleaning brush or a dry
cloth.
Keep the appliance and adapter dry.
Storage
Store the appliance and attachments in the charging stand
to prevent damage.
Replacement
If the adapter is damaged, always have it replaced with
one of the original type in order to avoid a hazard.
Only replace damaged or worn attachments or combs
with original Philips replacement attachments or combs
Philips replacement attachments, combs and adapters are
available from your Philips dealer and authorised Philips
service centres.
If you have any difculties obtaining an adapter or
replacement attachments and combs for the appliance,
contact the Philips Customer Care Centre in your
country (you nd its phone number in the worldwide
guarantee leaet).
Environment
Do not throw away the appliance with the normal
household waste at the end of its life, but hand it in
at an ofcial collection point for recycling. By doing
this, you help to preserve the environment (Fig. 24).
The built-in rechargeable battery contains substances
that may pollute the environment. Always remove the
battery before you discard and hand in the appliance at
an ofcial collection point. Dispose of the battery at an
ofcial collection point for batteries. If you have trouble
removing the battery, you can also take the appliance
to a Philips service centre. The staff of this centre will
remove the battery for you and will dispose of it in an
environmentally safe way.
Disposal of the battery
Only remove the battery when it is completely empty.
1 Disconnect the appliance from the mains and let
the appliance run until the motor stops.
2 Remove any comb and/or attachment from the
appliance.
3 Insert a screwdriver in the groove next to the shaft
at the top of the appliance.Turn the screwdriver to
separate the two housing halves (Fig. 25).
4 Lift the battery out of the housing by means of a
screwdriver. Twist the connecting wires until they
break (Fig. 26).
Do not connect the appliance to the mains again after
you have removed the battery.
Guarantee & service
If you need information or if you have a problem, please
visit the Philips website at www.philips.com or contact
the Philips Customer Care Centre in your country
(you nd its phone number in the worldwide guarantee
leaet). If there is no Customer Care Centre in your
country, go to your local Philips dealer or contact the
Service Department of Philips Domestic Appliances and
Personal Care BV.
,
4239.000.5873.2

Loading…
등급
필립스 QG3150 이발기 대해 어떻게 생각하시는지 제품 평점을 남겨 알려주세요. 제품 후기 및 질문을 공유하고 싶으신가요? 페이지 하단에 코멘트를 남겨주세요.이 설명서에 대한 추가 정보
필립스 QG3150 이발기에 대한 종이 설명서가 있으면 좋다고 생각합니다. 언제든지 당사 웹사이트에서 설명서를 다운로드하여 직접 인쇄하실 수 있습니다. 원본 설명서를 원하시면 Philips에 문의하시기 바랍니다. 원본 매뉴얼을 제공할 수도 있습니다. 다른 언어로 된 필립스 QG3150 이발기 설명서를 찾고 계십니까? 홈페이지에서 원하는 언어를 선택하고 모델 번호를 검색하여 사용 가능한지 확인하세요.
명세서
| 브랜드 | Philips |
| 모델 | QG3150 |
| 범주 | 이발기 |
| 파일 형식 | |
| 파일 크기 | 1.95 MB |
필립스 QG3150 이발기에 대해 자주 묻는 질문
저희 지원 팀은 자주 묻는 질문에 대한 유용한 제품 정보 및 답변을 찾고 있습니다. 자주 묻는 질문에 오류를 발견하신다면, 연락 양식에 따라 알려주시기 바랍니다.
클리퍼 크기는 무엇을 의미합니까? 확인 됨
클리퍼 크기는 일반적으로 클리핑 후 남아있는 머리카락의 양을 나타냅니다. 숫자가 높을수록 이발이 길어집니다.
도움이 됐습니다 (259) 더 읽어보세요젖은 머리카락에 이발기를 사용할 수 있습니까? 확인 됨
젖은 머리카락에 이발기를 사용하지 마십시오. 이발기가 끼어서 통증을 유발할 수 있습니다. 물로 인해 이발기의 날이 녹슬 수 있습니다.
도움이 됐습니다 (108) 더 읽어보세요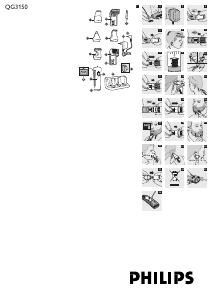


이 제품에 대한 대화 참여
여기서 필립스 QG3150 이발기에 대한 귀하의 생각을 공유할 수 있습니다. 궁금한 점이 있으면 먼저 설명서를 주의 깊게 읽어보세요. 매뉴얼 요청은 문의 양식을 사용하여 수행할 수 있습니다.