
, The charging light goes on to indicate that
the appliance is charging (Fig. 5).
4 Remove the shaver from the wall socket
when the battery is fully charged.
5 Press the release button (1) and fold the
foldable plug back into the appliance (2)
(‘click’) (Fig. 6).
Note: The light on the shaver does not change colour
and does not go out when the shaver is fully charged.
Cordless shaving time
A fully charged shaver has a cordless shaving
time of approximately 30 minutes.
Using the appliance
The shaver cannot be used directly from the
mains.
1 Remove the protection cap.
2 Push the on/off slide upwards to switch on
the shaver (Fig. 7).
3 Move the shaving heads over your skin. Make
both straight and circular movements (Fig. 8).
Note: Shave on a dry face only. Do not use the
shaver in combination with gel, foam or water.
Note: Your skin may need 2 or 3 weeks to get
accustomed to the Philips shaving system.
4 Push the on/off slide downwards to switch off
the shaver.
5 Clean the shaver after every shave, see
chapter ‘Cleaning and maintenance’.
6 Put the protection cap on the shaver after
use to prevent damage and to avoid dirt
accumulation in the shaving heads (Fig. 9).
Cleaning and maintenance
Never use scouring pads, abrasive cleaning
agents or aggressive liquids such as petrol or
acetone to clean the appliance.
Clean the shaver after every shave to guarantee
better shaving performance. For the best cleaning
result, we advise you to use Philips Cleaning Spray.
Ask your Philips dealer for information.
After every shave: shaving unit and
hair chamber
1 Switch off the shaver.
2 Clean the top of the appliance with the
cleaning brush supplied (Fig. 10).
3 Pull the shaving unit straight up off the
shaver (Fig. 11).
4 Clean the inside of the shaving unit with the
cleaning brush (Fig. 12).
5 Clean the hair chamber with the cleaning
brush (Fig. 13).
6 Put the shaving unit back onto the
shaver (Fig. 14).
ENGLISH
Introduction
Congratulations on your purchase and welcome
to Philips! To fully benet from the support
that Philips offers, register your product at
www.philips.com/welcome.
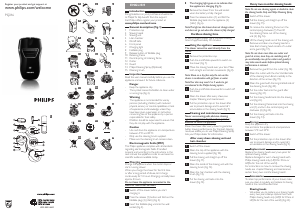
General description (Fig. 1)
1 Protection cap
2 Shaving heads
3 Shaving unit
4 Hair chamber
5 On/off slide
6 Front panel
7 Charging light
8 Foldable plug
9 Release button of foldable plug
10 Retaining frame
11 Central spring of retaining frame
12 Cutter
13 Guard
14 Philips Cleaning Spray (Optional)
15 Cleaning brush
Important
Read this user manual carefully before you use the
appliance and save it for future reference.
Danger
- Keep the appliance dry.
- This symbol means: Forbidden to clean under
a running tap (Fig. 2).
Warning
- This appliance is not intended for use by
persons (including children) with reduced
physical, sensory or mental capabilities, or lack
of experience and knowledge, unless they
have been given supervision or instruction
concerning use of the appliance by a person
responsible for their safety.
- Children should be supervised to ensure that
they do not play with the appliance.
Caution
- Use and store the appliance at a temperature
between 5°C and 35°C.
- Only use the cleaning brush supplied.
- Make sure the cleaning brush remains clean.
This Philips appliance complies with all standards
regarding electromagnetic elds. If handled
properly and according to the instructions in this
user manual, the appliance is safe to use based on
scientic evidence available today.
Charging
Charge the appliance when the motor stops or
starts running slower.
When you charge the shaver for the rst time
or after a long period of disuse, let it charge
continuously for 12 hours. Charging normally takes
approx. 8 hours.
Do not leave the appliance connected to the
mains for more than 24 hours.
1 Switch off the shaver before you start
charging it.
2 Press the release (1) button and fold out the
foldable plug (2) (‘click’) (Fig. 3).
3 Insert the foldable plug unit into the wall
socket (Fig. 4).
Every two months: shaving heads
Note: Do not use cleaning agents or alcohol to clean
the shaving heads. Only use Philips Cleaning Spray.
1 Switch off the shaver.
2 Pull the shaving unit straight up off the
shaver (Fig. 15).
3 To remove the retaining frame, turn the
central spring clockwise (1).Then lift
the retaining frame out of the shaving
unit (2) (Fig. 16).
4 Lift the shaving heads out of the shaving unit.
Remove and clean one shaving head at a
time. Each shaving head consists of a cutter
and a guard (Fig. 17).
Note: Do not clean more than one cutter and
guard at a time, since they are matching sets. If
you accidentally mix up the cutters and guards, it
may take several weeks before optimal shaving
performance is restored.
5 Remove the guard from the cutter (Fig. 18).
6 Clean the cutter with the short-bristled side
of the cleaning brush. Brush carefully in the
direction of the arrows (Fig. 19).
7 Clean the guard with the long-bristled side of
the cleaning brush (Fig. 20).
8 Put the cutter back into the guard after
cleaning (Fig. 21).
9 Put the shaving heads back into the shaving
unit (Fig. 22).
10 Put the retaining frame back into the shaving
unit (1), and turn the central spring anti
clockwise (2) (Fig. 23).
11 Put the shaving unit back onto the
shaver (Fig. 14).
Storage
Keep the appliance dry.
Use and store the appliance at a temperature
between 5°C and 35°C.
1 Switch off the shaver.
2 Put the protection cap on the shaver after
use to prevent damage and to avoid dirt
accumulation in the shaving heads (Fig. 9).
Replacement
Replace the shaving heads every two years for
optimal shaving results.
Replace damaged or worn shaving heads with
Philips shaving heads only (HQ4 for China or
HQ56 for the rest of the world).
For instructions on how to remove the shaving
heads, see chapter ‘Cleaning and maintenance’,
section ‘Every two months: shaving heads’.
Accessories
To retain top performance of your shaver, make
sure you clean it regularly and replace its shaving
heads at the recommended time.
Shaving heads
- We advise you to replace your shaving heads
every two years. Always replace them with
Philips shaving heads only (HQ4 for China or
HQ56 for the rest of the world) (Fig. 24).
PQ216
Register your product and get support at
www.philips.com/welcome
4222.002.5463.1
1
2
3 4
5
6 7
8 9
10
11
12 13
14
15 16
17
18 19
20 21
22
23
24 25
26
27 28



이 제품에 대한 대화 참여
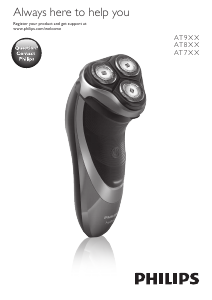
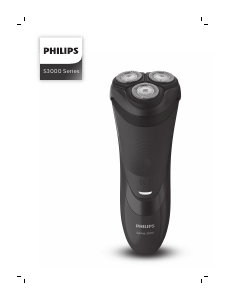
여기서 필립스 PQ216 전기면도기에 대한 귀하의 생각을 공유할 수 있습니다. 궁금한 점이 있으면 먼저 설명서를 주의 깊게 읽어보세요. 매뉴얼 요청은 문의 양식을 사용하여 수행할 수 있습니다.