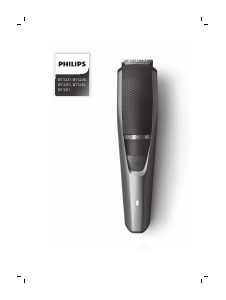
사용 설명서 필립스 BT1212 턱수염 정리기
필립스 BT1212 턱수염 정리기 에 대한 매뉴얼이 필요하십니까? 아래에서 한국어로 된 PDF 매뉴얼을 무료로 보고 다운로드할 수 있습니다. 이 제품은 현재 1 개의 자주 묻는 질문(FAQ), 0 개의 댓글이 있고 0 개의 투표를 받았습니다. 원하시는 매뉴얼이 아닐 경우 당사로 연락주시기 바랍니다.
제품 결함에 대한 해결책이 사용 설명서에 없나요? Repair Café 가셔서 무료 수리 서비스를 받을 수 있습니다.
사용 설명서
Loading…

When the appliance has charged for 8 hours, it has
a cordless operating time of up to 60 minutes.
1 Make sure the appliance is switched off.
2 Insert the micro USB plug into the appliance
and insert the USB plug in the supply unit (Fig.
4).
3 Put the supply unit in the wall socket.
4 After charging, remove the supply unit from the
wall socket and pull the micro USB plug out of
the appliance.
Using the appliance
Note: This appliance can be used without cord or
when it is connected to the wall socket.
Note: Switch off and clean the appliance after each
use.
Detaching and attaching cutting elements
1 To detach a cutting element, push upwards
against the teeth of the cutting element and
take it off the handle (Fig. 5).
2 To attach a cutting element, insert the lug of the
cutting element into the guiding slot at the front
and push the back of the cutting element onto
the appliance ('click') (Fig. 6).
Attaching and detaching combs
1 To attach any type of comb onto a cutting
element,slide the front part of the comb onto
the teeth and push the projection at the back of
the comb into the appliance ('click') (Fig. 7).
2 To detach any type of comb from the cutting
element, carefully pull its back part off the
appliance and then slide it off the cutting
element (Fig. 8).
Note: When trimming for the first time, start by
using the comb with the maximum trimming
length setting to familiarize yourself with the
appliance.
Switching the appliance on and off
1 Press the travel lock button, then slide the
on/off button upwards to switch on the
appliance (Fig. 9).
2 Slide the on/off button downwards to switch
off the appliance.
Trimming without comb
Use the full-size beard trimmer without a comb to
trim hair close to the skin (to a length of 1/32in
(0.5mm) or to create clean lines around your beard,
neck and sideburns.
1 To trim hair close to the skin, place the flat side
of the cutting element against your skin and
make strokes against the direction of hair
growth (Fig. 10).
2 For edging, hold the cutting element
perpendicular to the skin and move it upwards
or downwards with gentle pressure (Fig. 11).
Trimming with comb
Note: When you trim for the first time, start at the
highest length setting to familiarize yourself with
the appliance.
- You can use the beard and stubble comb
attached to the cutting element to groom your
beard and moustache in your preferred style.
1 Attach the comb (Fig. 7) to the full-size beard
trimmer.
2 Switch on the appliance.
3 To trim the most effective way, move the guard
against the direction of hair growth. Make sure
the surface of the guard always stays in contact
with the skin.
Stubble and beard combs
Attach a comb to the full-size beard trimmer to
trim your beard and moustache evenly. The
appliance comes with 1 stubble comb and 3 beard
combs. The hair length settings are indicated on
the combs. The settings correspond to the
remaining hair length after trimming.
Comb mm
Stubble comb 1mm
Beard comb 3mm
Beard comb 5mm
Beard comb 7mm
Cleaning
Cleaning after every use
Note: Never use scouring pads, abrasive cleaning
agents or aggressive liquids such as gasoline or
acetone to clean the product.
Clean the appliance after every use.
1 Turn off the appliance and disconnect from the
power outlet.
2 Remove any comb (Fig. 8) or cutting element
(Fig. 5) from the appliance.
3 Remove any hairs that have accumulated in the
hair chamber with the cleaning brush supplied
(Fig. 12).
4 Clean the cutting element with the cleaning
brush supplied (Fig. 13).
Ordering accessories
To buy accessories or spare parts, visit
www.shop.philips.com/service or go to your
Philips dealer. You can also contact the Philips
Consumer Care Center in your country (see the
international warranty leaflet for contact details).
Recycling
- This symbol means that this product shall not
be disposed of with normal household waste
(2012/19/EU) (Fig. 15).
- This symbol means that this product contains a
built-in rechargeable battery which shall not be
disposed of with normal household waste (Fig.
14) (2006/66/EC). Please take your product to
an official collection point or a Philips service
center to have a professional remove the
rechargeable battery.

Loading…
등급
필립스 BT1212 턱수염 정리기 대해 어떻게 생각하시는지 제품 평점을 남겨 알려주세요. 제품 후기 및 질문을 공유하고 싶으신가요? 페이지 하단에 코멘트를 남겨주세요.이 설명서에 대한 추가 정보
필립스 BT1212 턱수염 정리기에 대한 종이 설명서가 있으면 좋다고 생각합니다. 언제든지 당사 웹사이트에서 설명서를 다운로드하여 직접 인쇄하실 수 있습니다. 원본 설명서를 원하시면 Philips에 문의하시기 바랍니다. 원본 매뉴얼을 제공할 수도 있습니다. 다른 언어로 된 필립스 BT1212 턱수염 정리기 설명서를 찾고 계십니까? 홈페이지에서 원하는 언어를 선택하고 모델 번호를 검색하여 사용 가능한지 확인하세요.
명세서
| 브랜드 | Philips |
| 모델 | BT1212 |
| 범주 | 턱수염 정리기 |
| 파일 형식 | |
| 파일 크기 | 0.7 MB |
필립스 턱수염 정리기에 대한 모든 매뉴얼
턱수염 정리기의 추가 매뉴얼
필립스 BT1212 턱수염 정리기에 대해 자주 묻는 질문
저희 지원 팀은 자주 묻는 질문에 대한 유용한 제품 정보 및 답변을 찾고 있습니다. 자주 묻는 질문에 오류를 발견하신다면, 연락 양식에 따라 알려주시기 바랍니다.
다른 머리카락에도 수염 트리머를 사용할 수 있습니까? 확인 됨
수염 트리머는 이발기보다 날이 얇기 때문에 짧은 머리에 더 적합합니다. 헤어 클리퍼는 두피 모발을 다듬기 위해 특별히 설계되었습니다.
도움이 됐습니다 (100) 더 읽어보세요


이 제품에 대한 대화 참여
여기서 필립스 BT1212 턱수염 정리기에 대한 귀하의 생각을 공유할 수 있습니다. 궁금한 점이 있으면 먼저 설명서를 주의 깊게 읽어보세요. 매뉴얼 요청은 문의 양식을 사용하여 수행할 수 있습니다.