사용 설명서 Nitecore UM4 배터리 충전기
Nitecore UM4 배터리 충전기 에 대한 매뉴얼이 필요하십니까? 아래에서 한국어로 된 PDF 매뉴얼을 무료로 보고 다운로드할 수 있습니다. 이 제품은 현재 0 개의 자주 묻는 질문과 0 개의 댓글을 보유하고 있으며 평균 제품 평점 100/100으로 2 투표를 받았습니다. 원하시는 매뉴얼이 아닐 경우 당사로 연락주시기 바랍니다.
제품 결함에 대한 해결책이 사용 설명서에 없나요? Repair Café 가셔서 무료 수리 서비스를 받을 수 있습니다.
사용 설명서
Loading…
-2- -3-
(English) UM4 User Manual
Operating Instructions
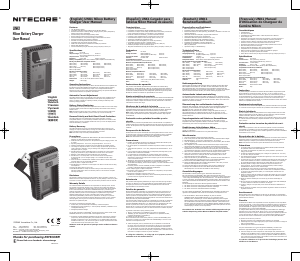
Connect to power source: connect the UM4 to an external power source (a USB adapter, a computer or other USB
charging devices) via the USB charging cable.
Insert batteries: The UM4 features 4 independently controlled charging slots. Insert batteries of supported types
into each slot according to the polarity marks on the slot. After battery installation, the UM4 begins charging and
presents Battery Health by “Good” or “Poor”, Internal Resistance, Charging Current, Battery Voltage, Charged Volume
and Charging Time on the LCD screen.
Battery Inspection and Error Report: The UM4 has reverse polarity protection and anti-short circuit function. If
there are batteries inserted with polar reversed or short-circuited, the LCD screen of relevant slot will indicate “EE EE”
and the power level display will ash to notify the user of an error.
Smart charging: The UM4 can choose appropriate charging currents based on intelligent detection about battery
types and capacities. Manual charging current selection is also available. The UM4 is compatible with:
1) 3.6V/3.7V Li-ion rechargeable batteries
2) 3.8V Li-ion rechargeable batteries (4.35V±1% when fully charged)
3) 1.2V Ni-MH/Ni-Cd rechargeable batteries
4) 3.2V LiFePO4 batteries
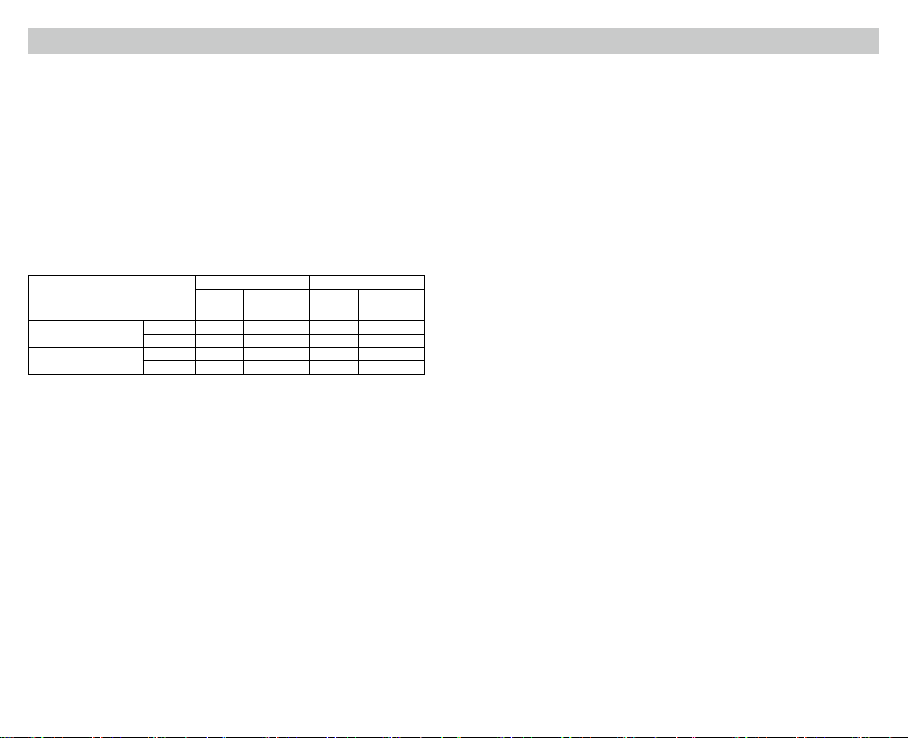
Default Settings
The default settings (not manually congured) for the UM4 are:
Battery Type and Capacity
Standard Mode QC Mode
Default
Charging
Current
Selectable Range
of Charging
Current
Default
Charging
Current
Selectable Range
of Charging
Current
Li-ion batteries
(4.2V±1% when fully charged)
>1,200 mAh 1,000mA 300mA-1,500mA 1,000mA 300mA-1,500mA
<1,200 mAh 500mA 300mA-1,500mA 500mA 300mA-1,500mA
Ni-MH/Ni-Cd batteries
(1.48V±1% when fully charged)
AA/AAA 500mA 300mA-1,500mA 500mA 300mA-1,500mA
C/D 1,000mA 300mA-1,500mA 1,000mA 300mA-1,500mA
Note: The UM4 can automatically select charging modes for Ni-MH/Ni-Cd batteries and 3.7V Li-ion batteries. LiFePO4
batteries and 3.8V Li-ion batteries require manual settings on charging cut-o voltages. For the battery whose length
is >60mm (2.4”), the UM4 automatically identies its capacity as >1,200mAh.
Button Operations
During the charging process:
Short press the C button to cycle through the charging status of the 4 slots.
Short press the V button to cycle through Battery Health, Internal Resistance, Charging Current, Battery Voltage,
Charged Volume and Charging time on the LCD screen.
Long press the C button to enter the Charging Setting Mode.
Long press the V button to enter Restoration Mode. (Only eective to over-discharged IMR batteries)
After entering the Charging Setting Mode:
Short press the C button to switch to dierent setting parameters (Charging Current and Cut-O Voltage).
Short press the V button to increase with a 100mA increment each time when setting the Charging Current; or to
switch to dierent battery types and voltage readings when setting the Cut-O Voltage.
Long press the V button to directly access the maximum setting when setting the Charging Current.
Long press the C button to save and exit the Charging Setting Mode.
Note: Perform no action in 10 seconds to exit the Charging Setting Mode without saving and return to the previous
settings.
Charging Voltage Settings
The UM4 is compatible with 3.6V/3.7V Li-ion and Ni-MH/Ni-Cd batteries with automatic detection and adoption of the
suitable charging voltage. For LiFePO4 batteries and 3.8V Li-ion batteries, please follow the steps below for charging
voltage settings:
1. After the battery is inserted and the charging process begins, short press the C button to select the correct slot
and long press the C button to enter Charging Setting Mode.
2. After entering Charging Setting Mode, short press the C button. When the screen shows the ashing text “CHG.
MODE”, short press the V button to select the correct charging voltage (3.7V/4.2V/4.3V).
3. For LiFePO4 batteries, the voltage needs to be set to 3.7V. For 3.8V Li-ion batteries, the voltage needs to be set to
4.3V.
4. When the setting is nalized, long press the C button to save and exit the Charging Setting Mode.
Charging Current Settings
Please follow the steps below for charging current settings:
1. After the battery is inserted and the charging process begins, short press the C button to select the correct slot
and long press the C button to enter Charging Setting Mode.
2. After entering Charging Setting Mode, the screen will show the ashing text “CHG. STATUS”. Short press the V
button to increase the charging current with a 100mA increment each time. Long press the V button to directly
access the maximum setting.
3. When the setting is nalized, long press the C button to save and exit the Charging Setting Mode.
Note: When the input power is insucient and a large charging current is set, the charger will automatically adopt
the intelligent current distribution according to the input power.
QC Charging Mode
The UM4 is QC 2.0 input available. When the charger is powered by a QC supportive device or connected to a QC
adapter, the screen will show “Quick Charge” and the single slot max output will achieve 1,500mA.
Automatic Battery Internal Resistance Detection
When the UM4 is on and the battery is installed, it will automatically detect and display the Internal Resistance below
the “CHG. STATUS”. When the Internal Resistance is below 250mΩ, it will show “Good” on the screen. When it is
above 250mΩ, it will show “Poor” on the screen to indicate that the battery should be replaced.
Charged Volume Calculation
During the charging process, the system will automatically calculate and display the Charged Volume below the “CHG.
STATUS”.
Anti-short Circuiting and Reverse Polarity Protection
If there are batteries inserted with polar reversed or short-circuited, the screen will ash to show “EE EE”.
Energy Saving Function
If there is no action to the buttons or batteries in 3 minutes, the screen will automatically go dim to save energy.
Perform any action to light up the screen.
Over-Discharged Li-ion Battery Activation
The UM4 is capable of activating over-discharged Li-ion batteries with a protective circuit. After battery installation,
UM4 will test and activate the battery before charging. When a battery is detected as damaged, the screen will show “EE
EE”.
Over-Discharged IMR Battery Restoration
When an over-discharged IMR battery is inserted, the screen will show “EE EE”. In this case, long press the V button
to enter Restoration Mode. After that, the charging process will continue. The battery should be replaced if it fails to
be restored after several attempts.
NOTE: When attempting to restore an IMR battery, reverse polarity protection is temporarily disabled. Please ensure
batteries are correctly inserted. Failing to do so may result in re or explosion.
Overtime Charging Protection
The UM4 will separately calculate the charging time of each battery. When the charging time exceeds 20 hours in one
slot, it will automatically cease the charging process of this slot and display “END” below the “CHG. STATUS”. This is
to prevent possible overheat or even explosion due to battery quality issue.
Precautions
1. The charger is restricted to charging Li-ion, IMR, LiFePO4, Ni-MH/Ni-Cd rechargeable batteries only. DO NOT use
the charger with other types of batteries as this could result in battery explosion, cracking or leaking, causing
property damage and/or personal injury.
2. Moderate heat from this product is to be expected during the charging process, which is normal.
3. Ambient Temperature of Usage: -10~40℃ (14~104℉); Temperature of Storage: -20~60℃ (-4~140℉)
4. Carefully read all labels on the device to ensure batteries are installed correctly.
5. Please connect this charger to power supplies with the input voltage stated in the specications of the user
manual. If the input voltage is too low or too high, it may lead to malfunctions, or even a re.
6. DO NOT charge batteries if there is any sign of faulty or short circuit.
7. The charger is designed for adults. Use of the charger by kids under age must be under supervision. Operation,
using or cleaning of the charger may NOT be done by kids aged 8 years or younger.

Loading…
등급
Nitecore UM4 배터리 충전기 대해 어떻게 생각하시는지 제품 평점을 남겨 알려주세요. 제품 후기 및 질문을 공유하고 싶으신가요? 페이지 하단에 코멘트를 남겨주세요.이 설명서에 대한 추가 정보
Nitecore UM4 배터리 충전기에 대한 종이 설명서가 있으면 좋다고 생각합니다. 언제든지 당사 웹사이트에서 설명서를 다운로드하여 직접 인쇄하실 수 있습니다. 원본 설명서를 원하시면 Nitecore에 문의하시기 바랍니다. 원본 매뉴얼을 제공할 수도 있습니다. 다른 언어로 된 Nitecore UM4 배터리 충전기 설명서를 찾고 계십니까? 홈페이지에서 원하는 언어를 선택하고 모델 번호를 검색하여 사용 가능한지 확인하세요.
명세서
| 브랜드 | Nitecore |
| 모델 | UM4 |
| 범주 | 배터리 충전기 |
| 파일 형식 | |
| 파일 크기 | 1.19 MB |
Nitecore 배터리 충전기에 대한 모든 매뉴얼
배터리 충전기의 추가 매뉴얼
이 제품에 대한 대화 참여
여기서 Nitecore UM4 배터리 충전기에 대한 귀하의 생각을 공유할 수 있습니다. 궁금한 점이 있으면 먼저 설명서를 주의 깊게 읽어보세요. 매뉴얼 요청은 문의 양식을 사용하여 수행할 수 있습니다.